
59. Custom “Squier 52 Hipshot Special”
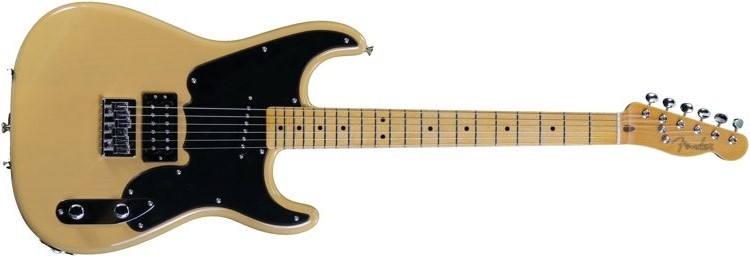
IF you’ve been with me from the start, you’ll know all about my fondness for one of the quirkiest (and in my opinion, the very best) designs to come from the Fender stable this century, the Squier 51.
When I first clapped eyes on this marvellously affordable Indonesian Strat-meets-Tele in 2004, it was love at first sight. Within a week, I was unpacking a new blonde 51 – a genuine novelty for me, since I very rarely buy brand new guitars.
When I first saw pictures of the 51, my first thought was that it would be perfect for slide. I was right. Almost two decades on, my original £110 Indonesian treasure – with a couple of key modifications and a set of 13-guage strings – is still my go-to guitar for slide.

And yes, I do have a bit of a thing about tortoiseshell!
The Squier 51 was pretty popular with the guitar-modding community in the mid-2000s. It was cheap and cheerful and all the important components were solid,reasonable quality. Some people didn’t like the stock Indonesian pickups, tuners and bridges and immediately swapped them out, but personally, I really like the original pickups, certainly for slide. For practical reasons, though, I did change the tuners and the bridge.
First I fitted a Hipshot Trilogy multiple tuning bridge (it cost more than I paid new for the entire guitar!) The Trilogy – now sadly, discontinued – allows quick access to a range of tunings and, to a slide player, is worth its not inconsiderable weight in gold. (For more information about the Trilogy, see the post about my original 51.) I also changed the tuners for Wilkinson’s excellent EZ-Lok units and added low-friction string trees – all in the name of better tuning stability.
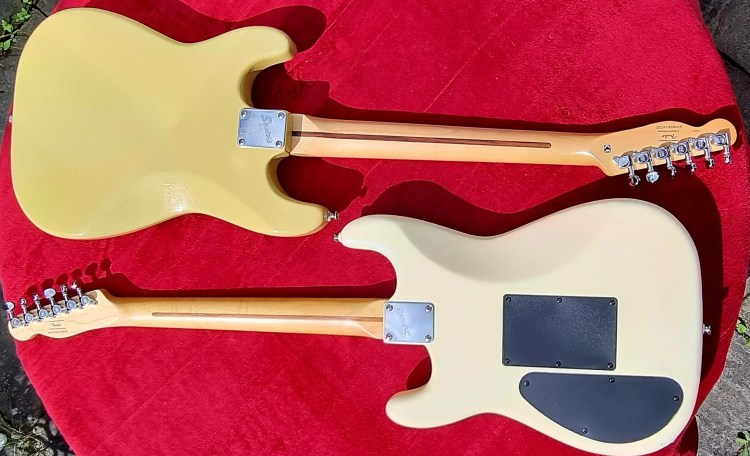
Where the original Squier 51 might be said to fall short is that its body is 5mm thinner than a standard Strat’s. I suspect it was originally something to do with the heavy basswood used by the Cort factory where they were built. The original 51s are all weighty instruments.How much heavier would they have been with a full-depth body of the same wood?

I’d often wondered what a 51 with a full-depth Strat body might be like. If I’d had £500-odd to spare, I could’ve found out. A few years after the original Squier 51 was discontinued, Fender Japan brought out its own version, the Pawn Shop 51, with a full-thickness body – and unlike the Squier version, a proper hardtail, string-through bridge. It goes to show how happy I was with my original Squier, though, that I never had the urge to as much as try a Japanese Pawn Shop 51.
In mid-2022, quite some time into the guitar-building bug, I decided to create a Squier 51 with a full-sized body. I’d put together several pretty reasonable guitars using Booboo Guitars’ affordable factory reject bodies and was pleased to find a nice, light (less than 2kgs, my benchmark for Strat and Tele bodies) back-routed twin-humbucker alder Strat body for an insanely reasonable price.
It was close to what I needed, but had a Strat tremolo rout and the wings of the humbucker rout were a tad wider than the Tele bridgeplate. The good news, though, was that the enormous Squier 51 pickguard would hide a multitude of sins, allowing me to hack out a decent lump of matching timber from which to fashion a plug for the tremolo rout. The resulting crater wasn’t pretty, but who (apart from you, looking at the pics in this blog) was ever going to see it?

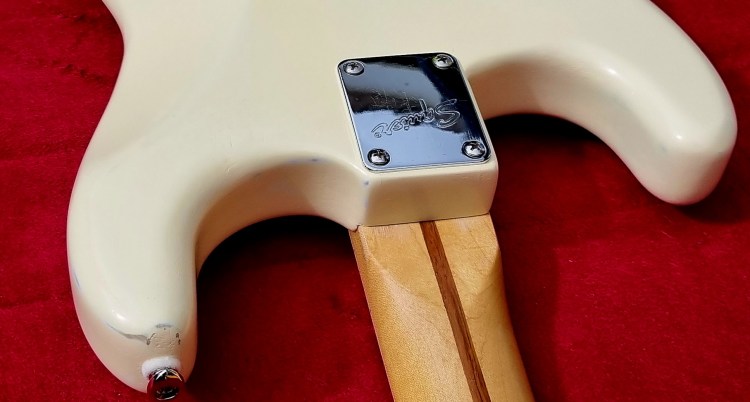
One stray control pot hole needed filling and I was pleased at how invisibly I managed this. I had to take the body to my Burnham guitar builder friend Steve Edwards for a little bit of routing and tidying up and he had a nice black backplate that matched the control cavity plate I’d already made. He even offered to rout the back, so the cover would sit flush to the body. Nice one Steve!
I originally planned to steal the neck from one of my other Squier 51s, but a couple of weeks scouring eBay and Facebook Marketplace yielded a really nice 2005 Indonesian Squier Standard series Telecaster neck for a reasonable price. (Squier necks – even bog-standard ones – are getting quite expensive these days!)
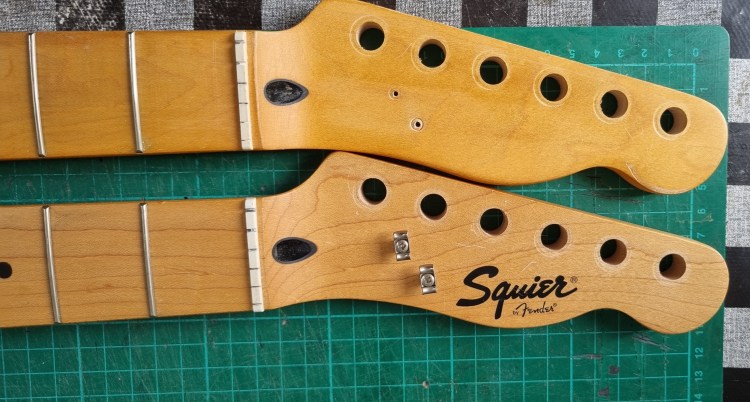
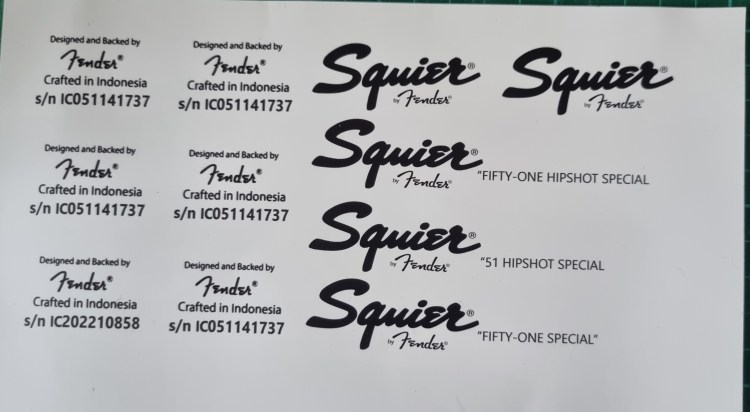
The previous owner had sanded off the Squier headstock decal and replaced it with a dodgy-looking Fender decal in entirely the wrong place. That DEFINITELY had to go! In its place, I opted for the original plain black Squier logo. But where the original 51s never had model name on the head, I designed a “Squier 51 Hipshot Special” decal to print on my trusty inkjet printer. While I was at it, I also created a pukka-looking “Crafted in Indonesia” decal for the back of the head, based on my original 51’s decal.
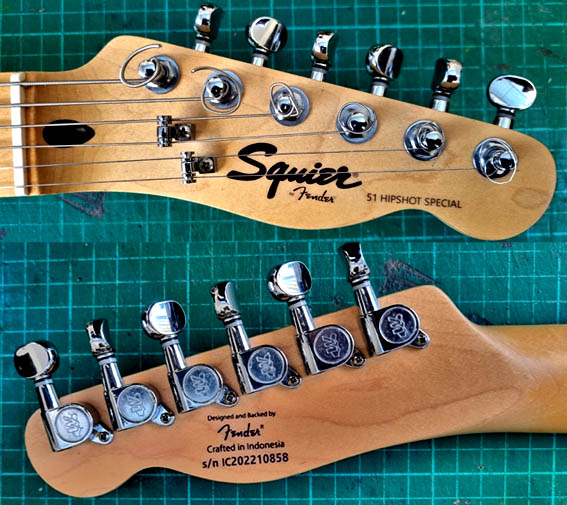
Then I sprayed the head with several protective layers of clear nitro. Unfortunately, the finish on the headstock was lighter than the rest of the neck. I’m not sure whether the original lacquer had a slight tint , or if the intervening 16 years had darkened the finish, but the previous owner’s efforts to sand off the Squier decal had left the headstock lighter and a bit on the blotchy side. Fortunately it was and exceptionally hot summer. A couple of weeks out in the sunshine did wonders for darkening up the nitro finish!
My original plan was to finish the body with Tru-Oil over an acrylic paint, aiming for something close to the dark blonde finish on my original 51. However, after a couple of weeks of painting, sanding it off, trying again I had to admit defeat. The resulting colour was a lurid and uneven yellow, a look charitably described as “interesting”! Back to the drawing board…


I’d last considered spraying nitro on guitar body a couple years before when I put together my baritone Telemaster, but ruled it out because it was winter and I lacked a suitably heated, ventilated and dust-free indoor space. The bari was the first time I’d used Tru-Oil and it was so successful, I’d then used it on my next two projects.
August 2022 presented a perfect opportunity finally to have a crack at nitro. After a couple of days immersed in endless “how to spray nitro” videos on YouTube – there are very few things you can’t learn to do by Googling up the appropriate “how to” video – I was good to go.

I built a rather Heath-Robinson-looking spray booth (thin ply screwed onto the sides of my trusty Black and Decker workbench, with a tarpaulin curtain over the open end) in the porch at the rear of my house, then set to with spraycans of nitro from the redoubtable Northwest Guitars. First off was a white primer, followed by a shade called “Vintage White”, a slight off-white that instantly recalls vintage Strats from the early 60s.
Surface preparation I’d learned, was the key to a good finish, so after several days of sanding with various grades of paper, I decided I was ready for spraying. Goggles and a decent face mask are a must, since nitrocellulose paint is evil stuff and best kept out of the eyes and the lungs!
Compared to the fortnight-long, one-coat-a-day Tru-Oil application regime I was used to, spraying was a fairly quick process, the trick being to build up repeated thin coats over a few hours, so the paint doesn’t have a chance to run. The next part is where you need extreme patience – the long, frustrating wait while the paint “cures”. I was advised to leave it a fortnight before attempting to rub it down and buff it, so I waited until I returned from holiday.

After “flatting” the finish with progressively fine, soggy wet and dry paper, I was pretty pleased with the results. It looked rather better than I’d expected and after some vigorous buffing by hand with T-Cut, I was feeling pretty pleased with myself. However – there always has to be a but, doesn’t there? – my first attempt at spraying nitro did teach me three important lessons:
1. I should have grain-filled the bits where end-grain was on show – the foream contour and belly-cut in the finished guitar were still showing a bit of grain, in contrast to the other super-smooth flat surfaces;
2. I should’ve invested in a third can of Vintage White and a second can of clearcoat. As soon as I started sanding, I discovered the finish was REALLY thin around the edges of the horns and cutaways. I ended up with a bit of white primer showing through in these areas. Great if you’re going for a “relic” look; not so great, otherwise.
3. l DEFINITELY shouldn’t have dropped the bloody thing on the concrete outside after all that effort to get a perfect finish! As I went to fit the bridge and bridge pickup, discovered I needed to rout out a bit more wood to accommodate the pickup. I took the body outside, did the business with the router, then turned the body over to tip out the surplus wood and sawdust. That was the point at which I managed to DROP the damned thing! The unhappy landing scuffed up and dented the finish on both horns and added a couple of other scrapes where the body bounced on the paving slabs. Grrr!

What now? Leave it as it is and pass it off as a fairly implausible relic; patch it up as best I could; partly strip it, fill and sand the damaged bit; or strip it right back and buy more paint to refinish it? At the time, I was just too angry to decide!
Once I’d calmed down, I went for the middle option, using a pot of supposedly matching brush-on touch-up paint. Sadly, it proved impossible to patch it up invisibly. In the end, I did the best I could, buffed it up and called it a done deal. It’s not perfect, but the finish looks fine from a distance and a couple of months and a few gigs later, it feels a lot less of a disaster than it did at the time.

At least the bridge and bridge pickup fitted now… The Hipshot bridge wasn’t just any old Trilogy. It was a very special one-off I’d been itching to use ever since the day, probably a decade earlier. I’d found it on eBay. It was the Telecaster version with the Hipshot Trilogy’s levers and cams mounted on a Tele-style bridgeplate This itself was an interesting proposition. I quite fancied using a Tele bridge with some kind of bladed Tele humbucker – if it was good enough for the Strats Sonny Landreth played it wass good enough for me!
Hipshot bridges are usually all black, but this one was a special order with a chrome-plated baseplate and bridge saddles. I’ve never seen another one like it. The original owner told me he’d played “Keef” in a Rolling Stones tribute band and ordered it so he could play the same guitar in the various tunings the Human Riff might use during a show.
My limited budget prevented me getting the Dimarzio Fast Track Tele pickup Sonny uses, After a ton of Googling around, I bought a medium-power Warman Peacemaker humbucker. This company’s stuff has a solid reputation and this proved a decent choice. For the neck pickup, I dipped into my big bag old Strat pickup sets from various Squier Strats I’d had over the years. I simply chose the one whose magnet looked most like the one in my original Squier 51’s and had a similar output. A bit unscientific, I know, but I got pretty close to the original without having to spend a penny.

One of the other quirky aspects of the original Squier 51 is that is has a rotary pickup selector on the control plate where the tone knob would be on a Telecaster. One of the mods I do to my 51s is to squeeze a mini-pot between the other two controls as a tone control. That was the easy bit. Finding the right switch and working out how to wire the damned thing was rather harder.
The original Squier 51 humbucker also has a coil tap (operated by a push-pull switch on the volume knob) but coil taps are not something I like much. The original plan had been to use a four-way rotary switch (easier to find, it turned out, than the three-way variant) with the extra position giving a tapped single coil. After many frustrating hours with a meter and test leads, I was still none the wiser, so I sprung for a three-way, followed a standard Squier circuit diagram I found online and – bingo – it worked!

The pickguard – one of the most distinctive aspects of Squier 51s has to be that 51-P-Bass-style guard, extending right up the top horn – was relatively easy. I had a spare, white, 51 pickguard in my bits box and used this as a guide. The final shape had to be modified and extended to fit around the Hipshot’s bridgeplate and cover the original bridge pickup cavity’s “wings”. A combination of trial, error, cardboard and Prit Stick eventually produced a final cutting template. In recent times, I’ve become fairly obsessed with tortoiseshell, so torty I would be – nothing looks smarter on a guitar, in my opinion. I already had a large sheet of four-ply (black-white-black-torty) material earlier in the year and had already made a guard for my original 2004 Squier 51, so that made my choice even simpler.


For the past couple of years, I’ve been making my own guards from plastic modelling card or the pickguard material you can buy everywhere online. As I’ve gone along I’ve got rather better at it. The arrival of my little Dremel multi-tool last year made a big difference. I use its cutting wheels to get the rough shape and then fine tune the outline, using sanding wheels. I even worked out a way of putting a 45-dgree bevel on the edges, though having recently also bought a proper palm router, I’ll probably end up using that for future projects as it gives a smoother, more consistent result.
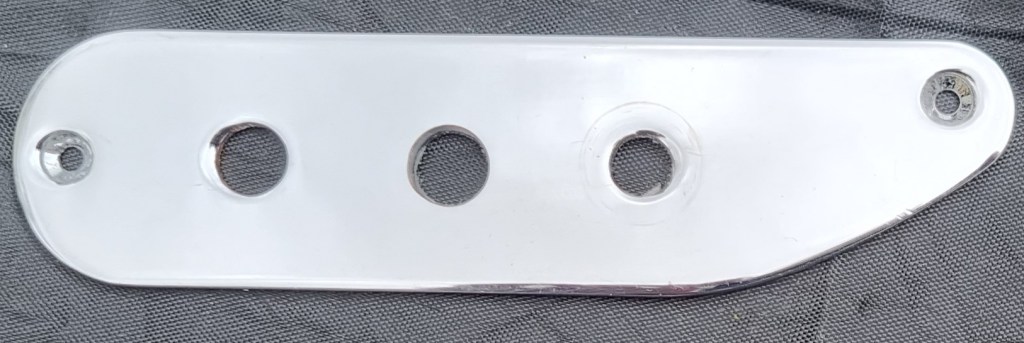
I happened to have a spare chromed steel control plate in my bits box, super-handy, since proper Squier 51 plates are hard to come by. (They might look similar to the ones used on 51 P-Basses, but they’re a slightly different size and shape.)
And so to the exciting bit – neck meets body; strings go on. Suddenly, it stops being a collection of parts and becomes a guitar. A bit of tweaking of the truss rod and a small shim to adjust the neck angle for the high string action I like for slide and it was done…more or less. Originally, the nut was cut too low, so to avoid excessive fret buzz, the action in the middle of the neck ended up rather too high. The answer was gently to ease out the nut (it was a relief when it popped out intact) and put a thin plastic shim underneath. With the nut a shade higher, I was able to remove the shim from the neck join, change the neck angle and slacken off the truss rod. As a result, the action is now perfect! 🙂
It’s strung with a nice set of Newtone Michael Messer Electric Slide strings, gauge 15-56. I use heavy strings for slide anyway, but this is the heaviest set I’ve used so far, since this guitar is meant for the slacker open D and G tunings – my other Hipshot-loaded 51 is set up with 13-52s for E and A tunings.

How did it work out after all that effort? Pretty good, actually. It tips the scales at 7lbs 12 oz. Not bad, considering the mass of metalwork in that Hipshot bridge. My original Squier 51, despite its thinner body, is a whole pound heavier!
I’m inclined to feel my £110 Indonesian Squier still has a slight edge, but I suspect that’s largely down to familiarity born of being played over the course of almost two decades and 1,000-plus gigs. It’s an old friend, but all the same, I think my new one more or less holds its own alongside it.

