61. Dakota red “Timcaster”
A tale of two necks and two (maybe three) bridges…
MORE than any of my guitar projects, this one really was made up as I went along. It started with a nice alder factory reject body from Booboo Guitars, a hardtail Strat body which was originally bought early in 2022 for what my personal take on the Squier 51s I’ve used for slide for years. (No 59)
No sooner had it arrived than I realised a Squier 51-type guitar actually demanded a body with Strat pickup and control routs on the front. I ordered a back-routed body from the same place and tried unsuccessfully, to sell the surplus body on Facebook Marketplace. It sat there for many months while I built my 51 and two projects later, was still there.

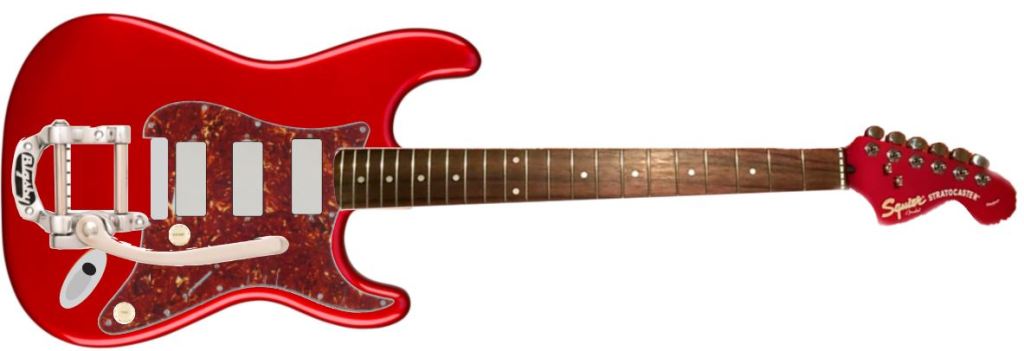
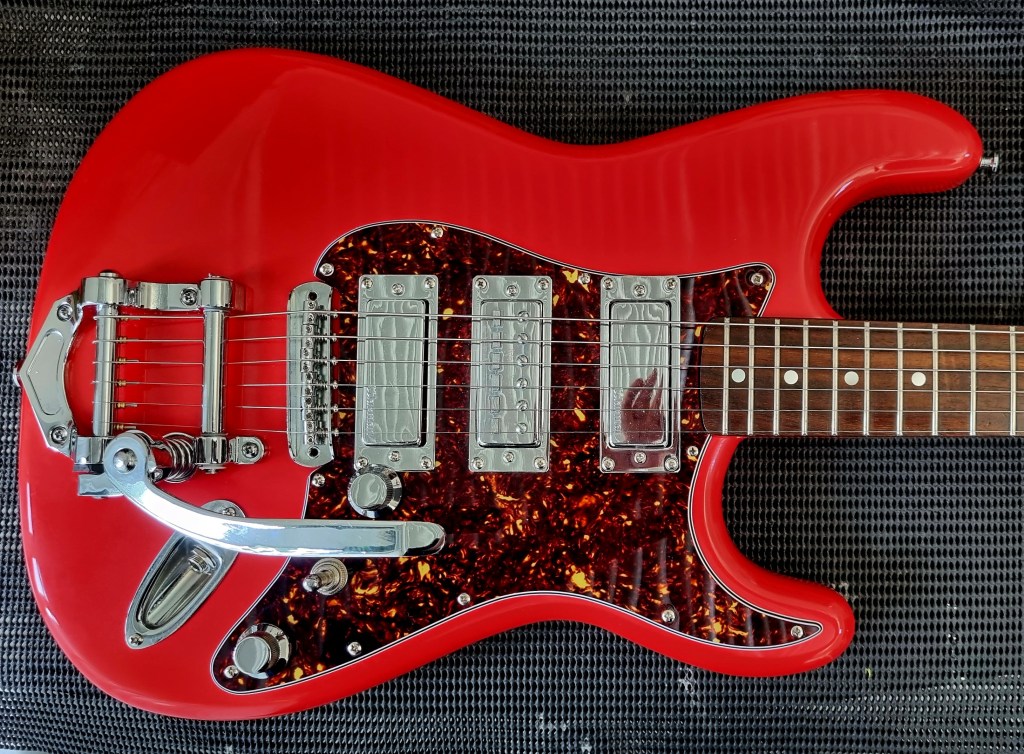
I’ve long been a big fan of traditional Fender guitars without loads of extra bells and whistles but had been inspired by a pic of one of Ry Cooder’s classic “Coodercasters”. It was a blue, large-headstock Strat with a Bigsby tremolo, something I don’t think I’d ever seen before. It just looked so damned cool…
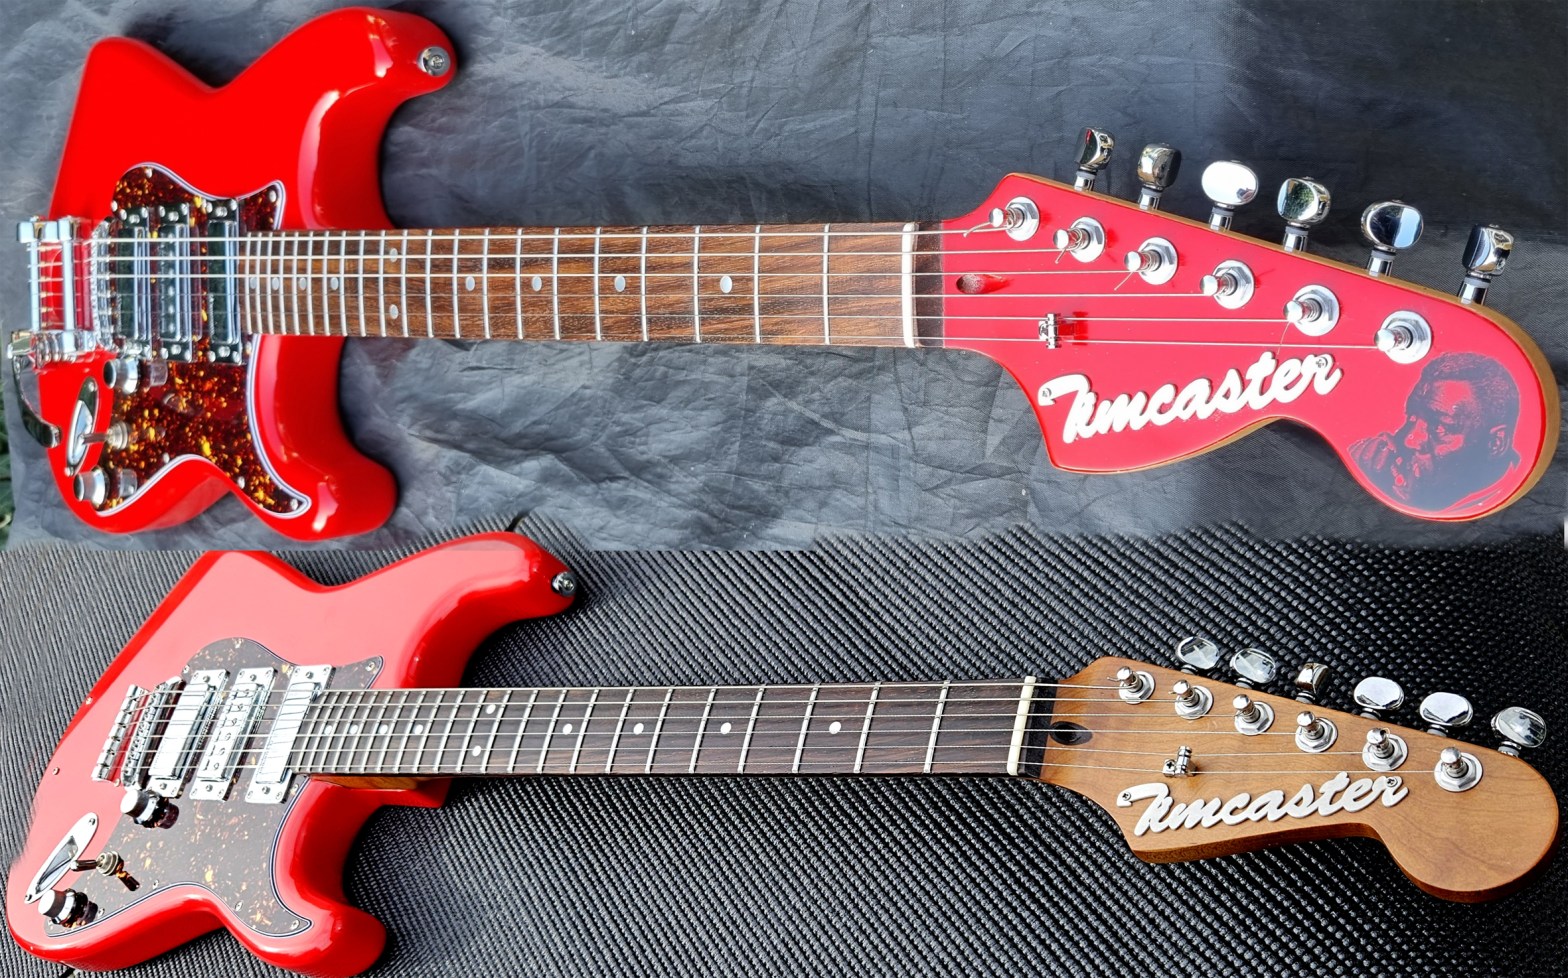
If I was putting so much chromed metalwork on a guitar, I decided to go the whole hog, adding chromed Firebird pickups and surrounds, chromed knobs, even a chrome switch tip. In short, Bling City. Where Cooder’s guitar was a subtle shade of pale blue, I plumped for red, with a matching red headstock.
At the time, I was pretty cash-strapped, so it had to be a budget build. I found a large-headstock Squier Strat neck on eBay for £30. Now I’ve had some great bargains on eBay, but I soon discovered this wasn’t one of them. The frets were in terrible nick – not so much worn as horribly corroded – as if it had been used to prop open the door of somebody’s garden shed for a couple of winters. Now I like a challenge and after a good deal of work with wire wool, various abrasives and my fret polishing kit, they came up surprisingly well.

It was getting towards to the time of year when the weather was warm enough to spray nitro again in an improvised spray booth in the back garden, so I masked off the headstock and sprayed the face in my chosen colour, a slightly obscure 60s Fender custom colour called Dakota red. This and other similar experiences have taught me you can never have enough cans of colour coat – you’re always likely to need just one more, for touch-ups, if nothing else.

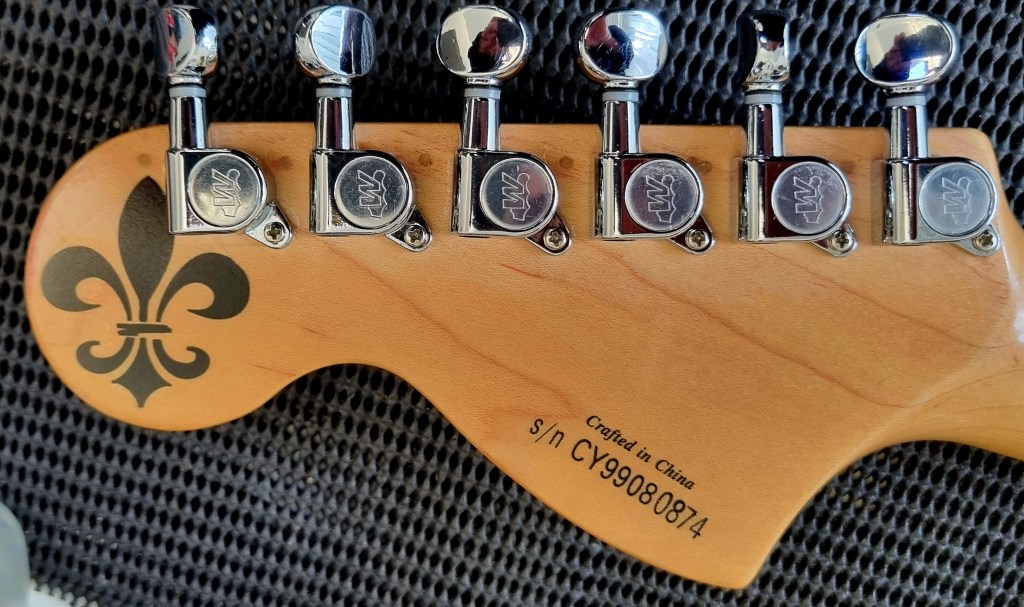
In keeping with the blingy theme, I ordered a slightly vulgar (or really cool – you choose) laser-cut metal headstock logo, spelling out the word, “Timcaster” in a vaguely Fenderish script. That was all I planned by way of ornamentation for the head. In the sanding and flatting process, however, I managed to sand a small spot at the end of the head right back to the white primer – by which time I’d used up all the rest of my red paint on the body!
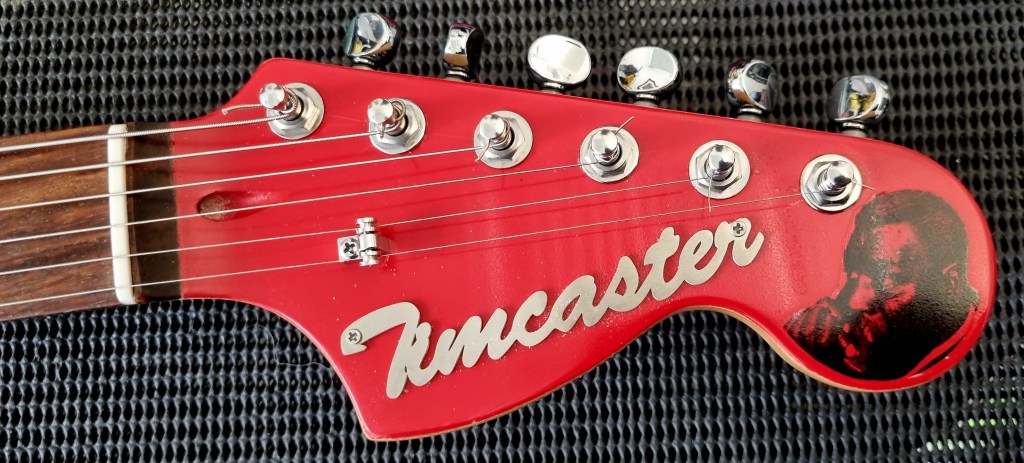
That’s how Howlin’ Wolf – my all-time blues hero – ended up on the headstock. I had some sheets of waterslide decal paper over from making logos for my Squier 51 project, so it was easy to download the pic, print it off and make a decal. I wasn’t 100% convinced, so as an alternative, I also printed a large fleur-de-lys design (it’s a New Orleans thing, folks!) Wolf fitted perfectly in the rounded end of the headstock, so that was where he went, while the fleur-de-lys went on the back. (I’ve since decided to repeat the latter on all my projects from now on, as a sort of trademark.)
Back to the body. It was originally routed for three strat pickups, so needed a bit of extra routing. I’m still not great with the electric router (it scares the life out of me, if I’m honest) and the resulting enlarged routs left a bit to be desired Thanks goodness for scratchplates and pickup rings to hide a multitude of sins!

Pickguard-wise, my love affair with tortoiseshell continues unabated, so there was no doubt what I’d be using on this guitar – especially after I found a website selling Strat guards with no pickup or control cutouts at all that I could cut to meet my needs.
With the body barely routed and unpainted, you might think it a tad premature to turn attention to pickups, but not so. Past experience, has taught me the sense of making sure all the parts fit together before committing expensive paint to wood.
My first choice would probably have been a nice set of Duncans or Lollars, but given this was a budget project, that was totally out of the question. I needed at least one Firebird mini right then, so I could offer it up and make sure the pickups really would fit my dodgy body routings and the only marginally better pickguard holes. I found an interesting-looking unbranded variation on the theme on eBay for just £15. It was the right size and shape and good enough for what I needed until I could get something better. My £15 pickup actually ended up in the least-used middle position, while my bridge and neck pickups were a really well-priced set of Warmans, a budget brand which never fails to impress me. (Their Firebird set was something like £35, but not half bad all the same!)
In the spray booth, the paint went on remarkably well. I think I’m finally getting the hang of it, even though, as I say, I’ve since learned the value of ordering one more can of colour coat than you think you’re going to need. No matter how hard you try, the paint never goes on as thickly on the edges of bodies as elsewhere. It’s all too easy to rub too much away during the flatting and sanding phase. Every spray job I’ve done has needed the odd touch-up. It’s is a pain, since you then have then to wait another couple of weeks for the nitro to go off before you can rub it down again. The extra effort was worth it, though. It’s my best spray finish to date – far from perfect, but pretty damned good unless you look at it too closely.
The other big hardware issue was the Bigsby tremolo with which I’d hoped to adorn the guitar. I hunted in vain for months for a proper Bigsby B5 or B50 (the cheaper Far Eastern version) for the right price. A few years before, when I’d put together my Gretsch-style hollowbody (No 53) I’d been lucky to find an “opened-but-unused” long-tail B30 for £70. No such luck this time.

As a stop-gap, I started looking at cheap knock-offs online. How bad could they really be? The answer, it turned out, was pretty bloody awful. I should have known better than to expect all that much for £25, but I went ahead and ordered one from Amazon, sharp edges, bent string pins and ill-fitting parts and all!
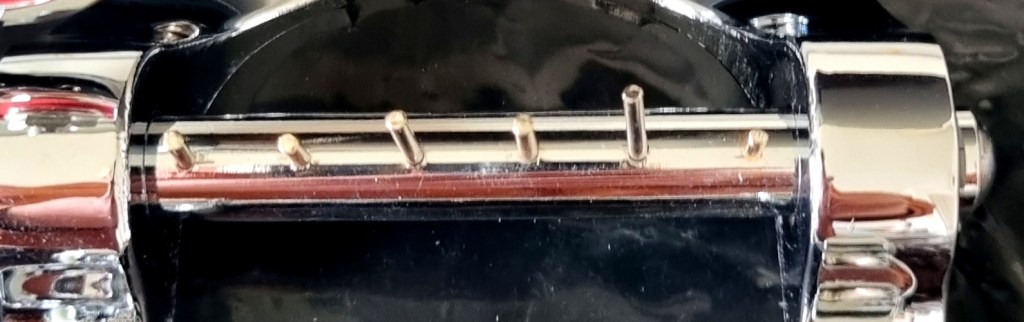
The main things to commend the one I ended up with were that it looked the part and appeared to fit the “footprint” of a real Bigsby, so I’d be able to swap it out when I found a real one – or the guitar turned out so well it justified the extra spending. (Still open to offers, guys!)
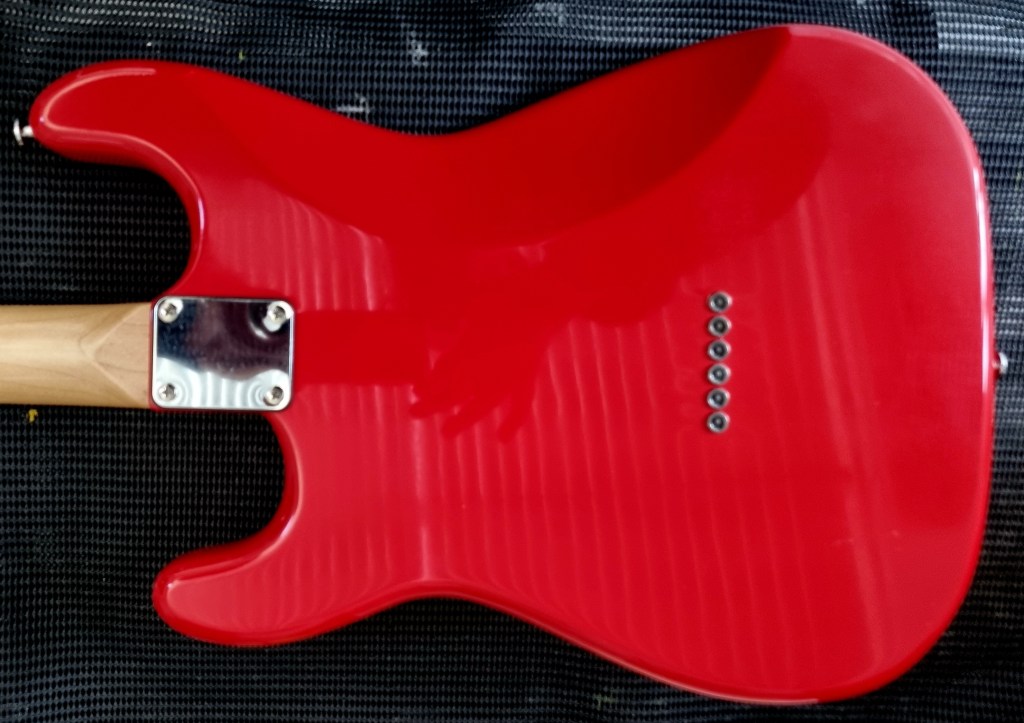
For the bridge itself, I went with a Jazzmaster/Jaguar style rocking unit on posts set into the body. (If you look at the flipside of the body, though, you’ll see I also fitted the kind of string ferrules you’d usually find on a hardtail Strat body. The holes were already drilled and it seemed the neatest way to finish them off. It also gives me the option at some future stage, to use a hardtail Strat bridge if I decide to go that way. Edit: I’ve just bought a hardtail bridge, so watch this space…)
The paint finally dry, flatted and buffed to an acccepable shine, it was time to wire it up, bolt the thing together, wheel it out to the proverbial the runway and see how well it flew…
Control-wise, I’d already decided on a single volume and a single tone, with a Gibson-style toggle mounted between them where the neck tone control would normally be on a Strat. That means you have a three-pole switch controlling three pickups, something which ordinarily, would mean no combinations of pickups, just a choice of neck, middle or bridge. Gibson, I gather, gets around this on three-pickup Les Pauls, SGs and Firebirds by either wiring a permanent bridge-plus-middle combination when the switch is in the middle position, or having the middle pickup permanently in the circuit, with a separate volume control, so you can dial as much or as little of it as you choose.
I didn’t fancy either option, but came up with a pretty successful compromise. I fitted a a push-push switch (I greatly prefer them to the push-pull variety) on the tone pot. When it’s down, it takes the middle pickup completely out of circuit, so the guitar switches like a Les Paul. When it pops up, it gives middle and bridge together when the toggle is in the bridge position and middle on its own when the toggle is in the middle. It actually works remarkably well and is DEFINITELY the way I would wire any similar guitars in future.

So, crunch time, Neck on; hardware fitted; soldering on off; strung up, tuned up and set up. How did it play? The answer, frankly, was rather disappointing. The action was rather high – too high even for me and I like my guitars with a bit of fight in them. Worst still, the truss rod refused point-blank to budge either way when I tried to adjust it. So I needed a new neck.
Back to eBay to look at brand new necks – enough of the Squier castoffs! Past experience long ago taught me some new necks offered on eBay for implausibly cheap prices are actually remarkably good – the one I put on my Esquire being a case in point. After a good bit of trawling, I came across a seller marketing “highly-figured roasted maple necks with stainless steel frets” – both quite high-end specs – for about £90, and apparently crafted in the UK. Too good to be true? Apparently not. A pound to a penny says my new neck didn’t really start life as a couple of bits of wood in a British workshop – more likely it came off a CNC machine somewhere in China. Still, there was no disputing the beauty of the wood, or the shininess of the frets! Truly a work of art.
The nut slots needed deepening, the nut needed a bit of shaping and the fret ends needed the odd sharp corner filing (hard work on stainless steel!) but it was just what I needed. I bolted it on, strung it up and didn’t even need to touch the truss rod.

Paint me super-pleased with the new neck – if rather less so with the knock-off Bigsby trem. It was a nightmare to keep in tune and I quickly replaced it with a £20 stop tailpiece screwed to the body. That did the trick. It now plays pretty well and behaves itself, tuning-wise. It’ll do, anyway, until I find a proper Bigsby for a price I’m prepared to pay.

The pickups sound pretty good – not amazing, but good enough for a total of £50. Anyway, I’m planning soon to replace the Gibson pickups on my 90s Firebird with a set of Lollars, so there’s an upgrade path without too much effort…
All in all, a fun project and one I do occasionally play on gigs. Not the best guitar I’ve ever put together, but a real looker with a very definite vibe to it. It puts me in mind of those funny old three-pickup Hofner Galaxies British guitarists had to satisfy themselves with in the 60s, when they couldn’t afford a proper red Strat like Hank’s. The irony, of course, is that those old Hofners are worth serious money themselves.

POSTSCRIPT
Inveterate tinkerer that I am, it was almost inevitable the Timcaster would only remain in the form you see above for a few months…
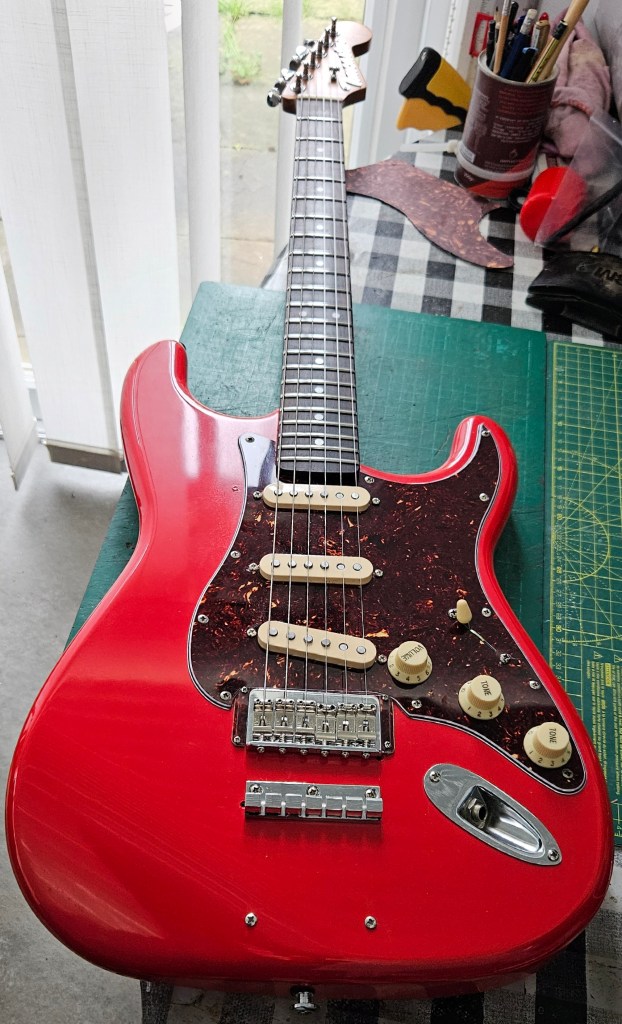
Those cheap Firebird pickups were OK, but they really weren’t doing a lot for me. They were a bit dull and lifeless, so I decided it was time to give the guitar an more classic look, reverting to a Strat single coil pickup layout. While I was at it, I added the hardtail Fender-style bridge the guitar had been crying out for ever since I inserted those string ferrules into the back of the body. (I had to screw on a couple of improvised tortoiseshell plates to cover up the post holes where I removed the Mustang bridge – which is why the pickguard looks a bit non-standard)
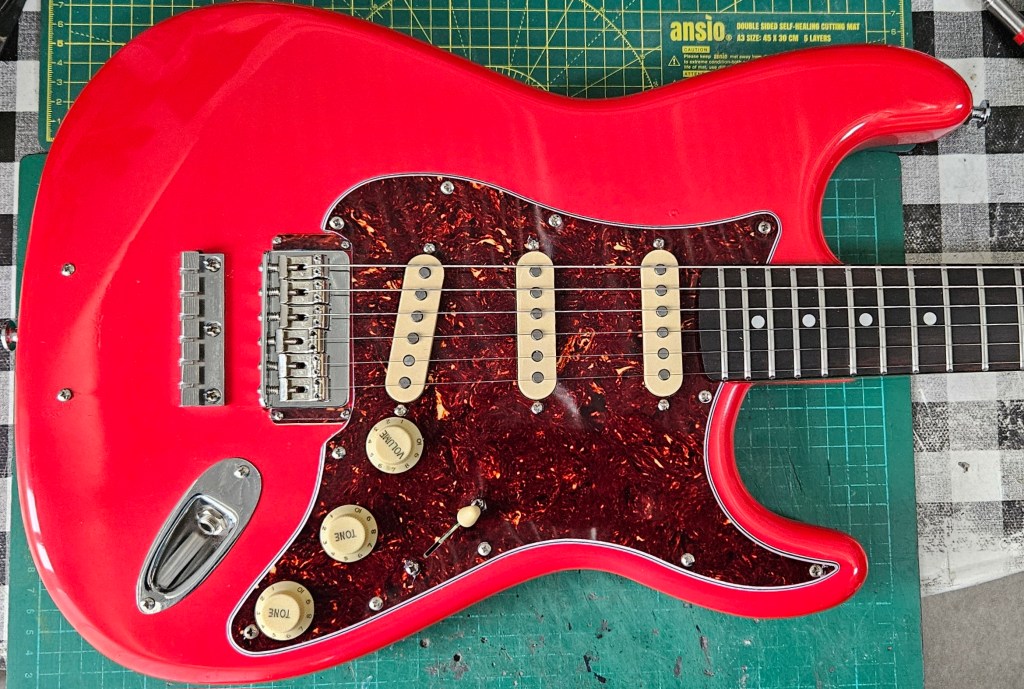
A new torty pickguard and a set of very nice-looking cheap Chinese Strat pickups from Temu later and it now looks like this…I actually really like it. It’s become my go-to guitar for playing about the house (although of course, that will probably change again before too long!)
The pickups aren’t great, but they do sound better than the cheap Firebird ones. I still have the original pickguard and wiring harness, so one day, if I can afford a really decent set of proper Firebird pickups, I might even give that configuration a try again. I recently replaced the crazily hot original Gibson pickups from my 91 Firebird with a nice set of Lollars, so you never know…one day, when I’m really bored, I might even give the Gibbos a go.
Unless, of course, anybody out there happens to have a cheap set of Klein 62 Strat pickups they don’t want. It’s always nice to have options. 🙂